Higgsfield AI Music Video: Clone Yourself & Make Singing Videos
Higgsfield AI Music Video: Clone Yourself and Make a Singing Video (Workflow Guide)
Last updated: February 2026
Author: Greg Preece — I test AI video tools hands-on and show creators how to get usable results fast (without turning your workflow into chaos).
If you want an AI “clone” of yourself that can sing any line of a song in basically any location, this is the simplest workflow I’ve found inside Higgsfield.
You’ll create a consistent character from a handful of selfies, generate a strong “master” image, then use Speak + a motion preset (like Rap Flex) to turn it into a performance shot.
TL;DR (Summary box)
- Create a character in Characters by uploading lots of clear selfies.
- Generate a strong location image first (pick the best of the 4 options).
- In Speak, upload your audio, choose a motion preset (Rap Flex worked well for rap), and generate on High quality.
- If plan/pricing access has changed since recording, verify on the official site.
Prefer to watch? Here’s the video. Prefer to skim? The full breakdown is below.
Quick links
- Higgsfield — Try Higgsfield →
Table of contents
- What this workflow lets you do
- What I tested and what I found
- Step 1: Create your AI clone in Characters
- Step 2: Generate a strong “master” image in your location
- Step 3: Make the image sing in Speak
- Troubleshooting: the fixes that matter
- FAQ
What this workflow lets you do
Higgsfield (Higgsfield AI) combines character creation, image generation, and speaking/lip-sync video generation in one place — so you can produce a performance shot without filming anything in real life.
This is ideal if you’re a creator who:
- wants music-video style visuals without travel, permits, or a shoot budget
- needs a consistent “you” character across multiple scenes
- wants quick iteration: generate 4 options, pick the best, move on
Try it here: Try Higgsfield →
What I tested and what I found
Based on what you see me do in the video:
- More (clear) selfies = better clone quality. I specifically look for the upload status to hit “excellent” before generating.
- The still image matters more than people think. When the still looked right, the final performance felt way more believable.
- Default motion looked stiff. Picking a motion preset made it feel like an actual performance.
- High quality was noticeably better than Medium (Medium didn’t hold up in my tests in the video).
Step 1: Create your AI clone in Characters
This is where you build a consistent version of your face that Higgsfield can reuse.
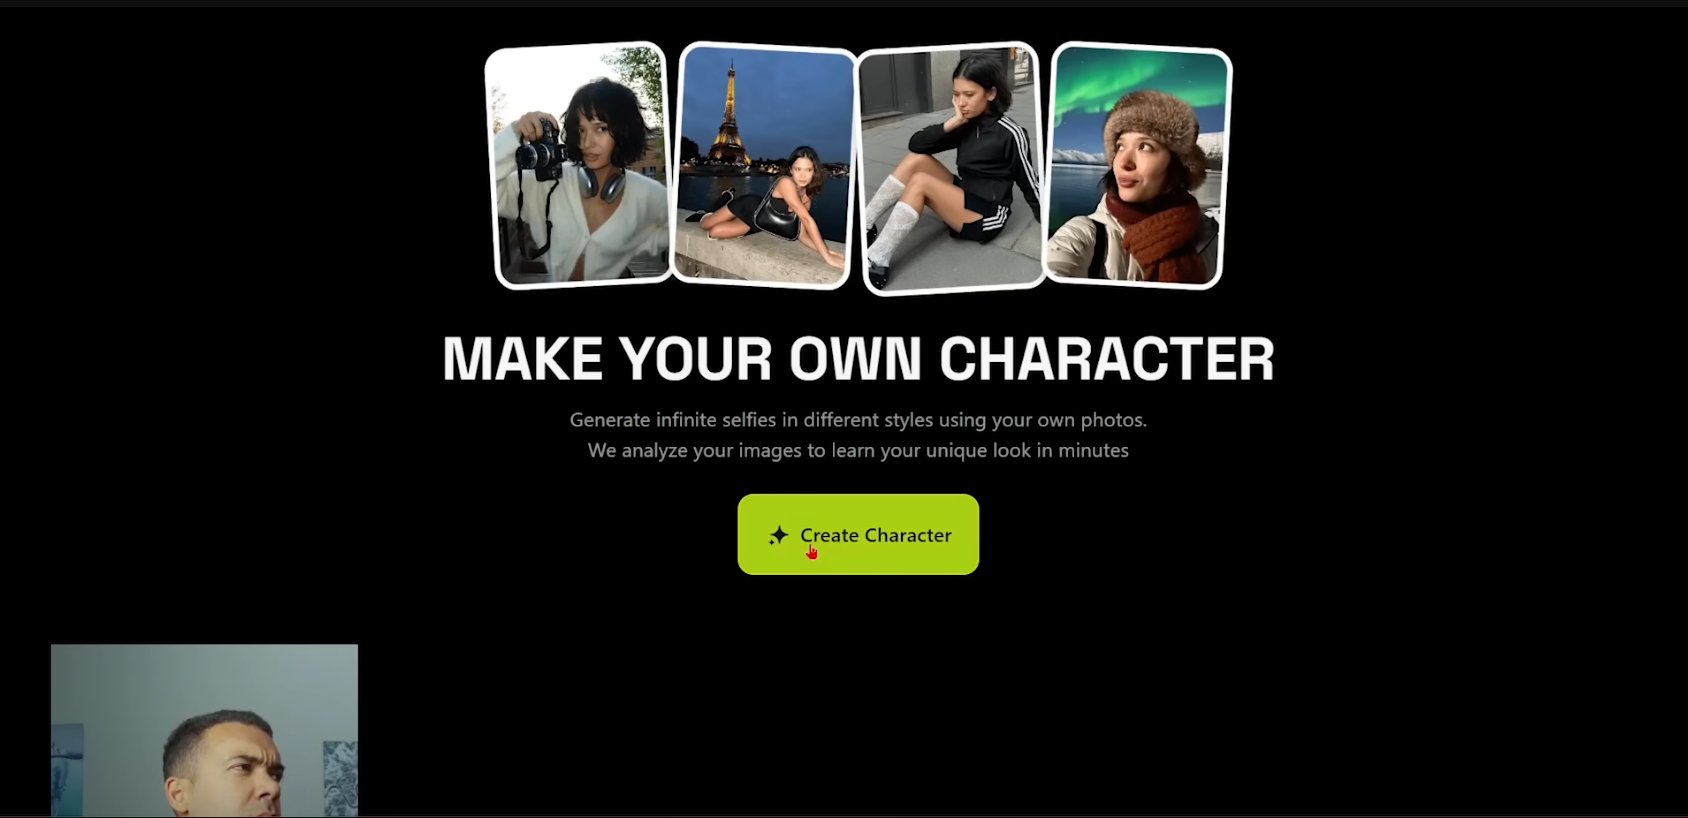 Caption: Upload multiple clear selfies (no obstructions) until the status indicates strong coverage, then generate your character.
Screenshot description: The “Characters” area showing “Create Character” with an upload panel and a progress/status indicator for training quality.
Alt text: Higgsfield Create Character photo upload screen
Caption: Upload multiple clear selfies (no obstructions) until the status indicates strong coverage, then generate your character.
Screenshot description: The “Characters” area showing “Create Character” with an upload panel and a progress/status indicator for training quality.
Alt text: Higgsfield Create Character photo upload screen
Do this
- Open Higgsfield and click the Character / Characters area at the top.
- Click Create character.
- Upload lots of images of yourself where your face is clearly visible (multiple angles helps).
- Keep adding photos until the quality/status indicator shows strong coverage (in the video, I’m looking for it to say “excellent”).
- Name your character (I used something like “AI Greg”) and click Generate.
- Wait for it to finish (in the video, it took around a few minutes), then your character appears in your character list.
Outcome you’re aiming for
A reusable clone you can drop into any new scene without your face changing every generation.
Step 2: Generate a strong “master” image in your location
Before you make anything “sing,” generate a single great image of your clone in the location you want. This becomes the foundation for the final video shot.
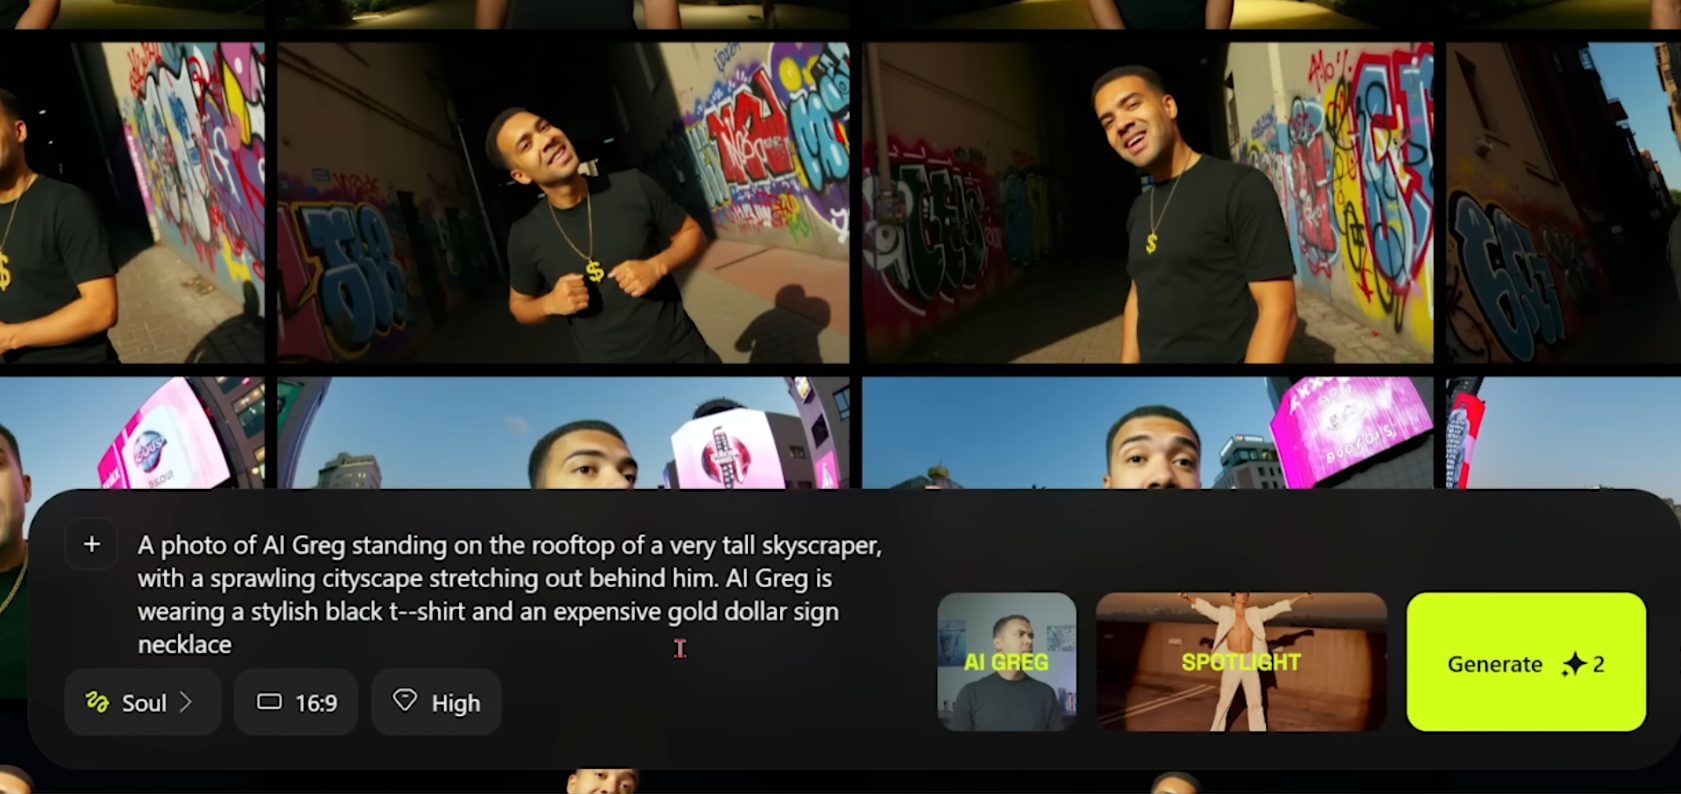 Caption: Prompt your clone into a specific location and outfit, choose the right aspect ratio, then generate and pick the best result.
Screenshot description: The image generation screen showing a prompt field, aspect ratio controls (horizontal/vertical), quality selection, and style/preset options.
Alt text: Higgsfield image generation prompt box for a location scene
Caption: Prompt your clone into a specific location and outfit, choose the right aspect ratio, then generate and pick the best result.
Screenshot description: The image generation screen showing a prompt field, aspect ratio controls (horizontal/vertical), quality selection, and style/preset options.
Alt text: Higgsfield image generation prompt box for a location scene
Do this
- Hover over your character and click Generate (or the equivalent “generate image” action on your character).
- In the prompt box, describe:
- the location (e.g., “standing on a tall skyscraper”)
- what you want the character wearing
- any vibe cues (lighting, mood) in plain English
- Set the aspect ratio for your target video format (horizontal if you’re making a standard landscape video).
- Keep quality high (as shown in the video).
- For style/presets, I used:
- Spotlight (a dramatic, direct-light look)
- Fisheye (a wide, lensy look)
- Click Generate and review the 4 outputs.
- Pick the best image — the one that actually looks like you, with the strongest lighting and detail.
Outcome you’re aiming for
One “this is undeniably me” still image in the right scene — because the next step builds motion and lip-sync on top of it.
Step 3: Make the image sing in Speak
Now you’ll take that still and generate a performance clip.
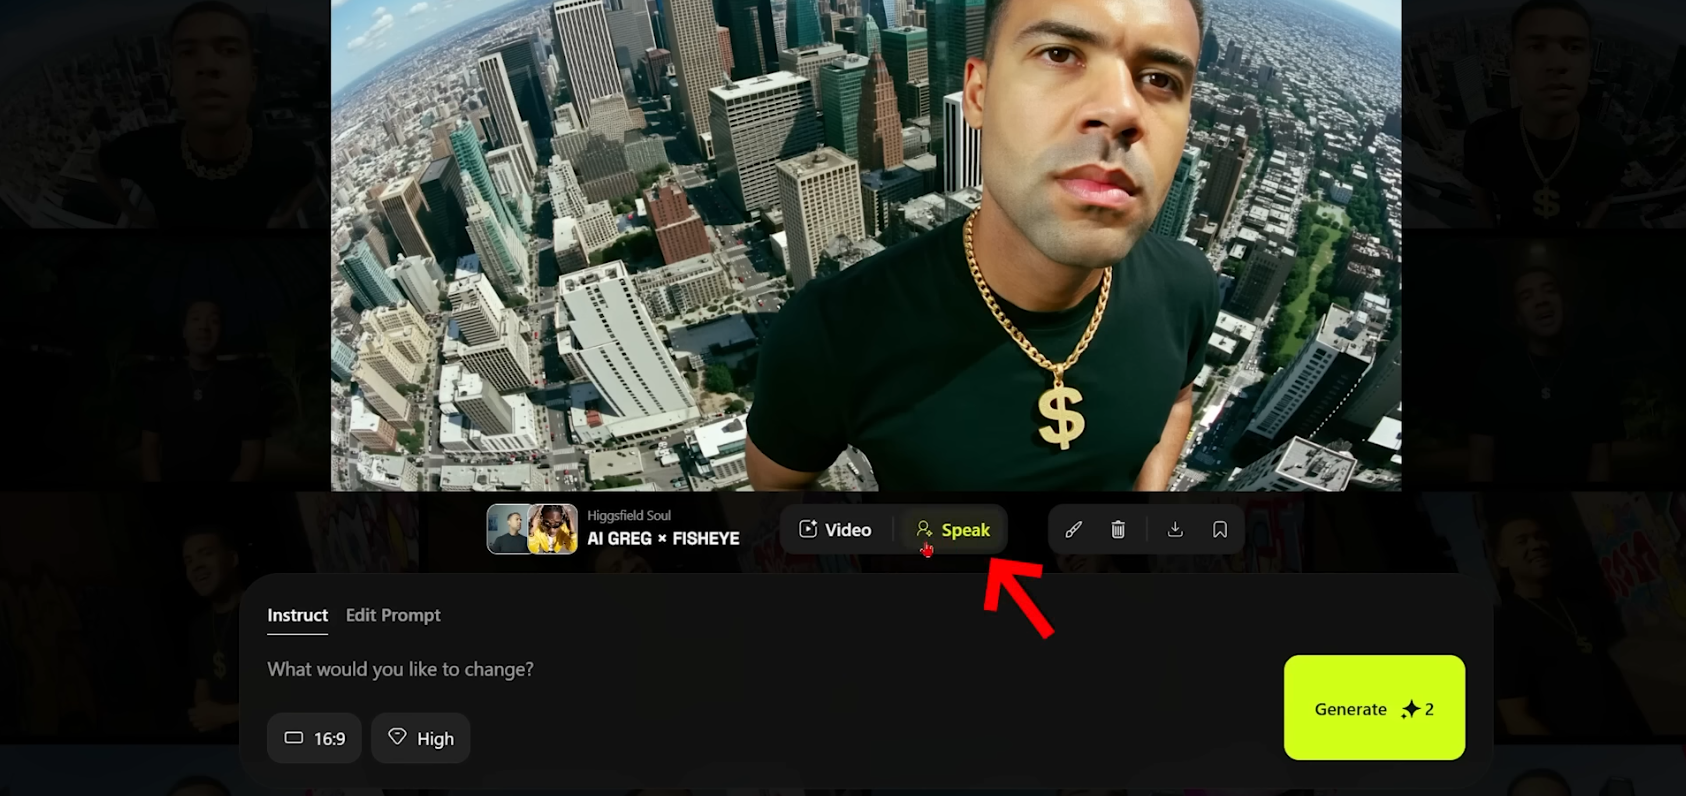 Caption: In Speak, attach your audio, choose a motion preset (Rap Flex worked well for rap), set quality to High, then generate your singing shot.
Screenshot description: The Speak interface showing a selected image thumbnail, an audio upload/select area, motion preset dropdown, and a Generate button.
Alt text: Higgsfield Speak screen with audio upload and motion preset selection
Caption: In Speak, attach your audio, choose a motion preset (Rap Flex worked well for rap), set quality to High, then generate your singing shot.
Screenshot description: The Speak interface showing a selected image thumbnail, an audio upload/select area, motion preset dropdown, and a Generate button.
Alt text: Higgsfield Speak screen with audio upload and motion preset selection
Do this
- Open your chosen image and click the Speak button to enter the Speak area.
- Select the still image you want to animate (your “master” image).
- Upload your audio:
- In the video, I used an MP3 and I’d already split it into line-by-line chunks, so I could pick one line at a time.
- Choose your motion/performance:
- I used Rap Flex because it looked the most natural for a rap music video vibe.
- If you want something else, open the presets list and test a few options.
- Set quality to High (I tested Medium and it didn’t look nearly as good).
- Hit Generate.
Outcome you’re aiming for
A short performance shot where your clone looks like it’s actually delivering the line — not just a static face flapping.
Troubleshooting: the fixes that matter
- Clone doesn’t look like you: Add more selfie angles, avoid obstructed faces (hands, sunglasses, harsh shadows), and regenerate.
- Result feels “off” even with a good clone: Your still image is probably the weak link. Generate more options and pick a stronger “master” frame.
- Performance looks stiff: Change the motion preset. The default movement can look generic.
- Quality looks mushy: Use High quality (as shown in the video), and keep your source image sharp.
- Audio feels awkward: Try shorter audio segments (line-by-line like I did) so each clip is a clean, intentional shot.
FAQ
Do I need a lot of selfies?
In the video, I got better results by uploading many clear photos from different angles. More coverage gave a better clone.
Can I use any song?
You can upload an MP3 in the workflow shown. For the cleanest results, I split the song into shorter lines and generated one clip at a time.
What plan do I need?
In the video, I mention character creation required a paid plan at the time. Plan access and pricing can change — verify on the official site before you commit.