AI UGC Video Ads to aProduct: How I Generate Realistic Ads (Tested)
Last updated: July 2026
Author: Greg Preece — I test AI video tools hands-on to find the most efficient workflows for e-commerce brands and creators looking to scale.
Running short-form video ads for physical products used to mean sending inventory to creators, waiting weeks for footage, and spending hours inside an editing timeline. With the latest advancements in video generation, you can now generate highly realistic user-generated content (UGC) ads—featuring digital creators realistically holding and demonstrating your actual product—in less than 20 minutes.
In this guide, I will walk you through my exact 3-step workflow to generate 30 high-converting AI UGC video ads using a single all-in-one platform.
Summary: My Top Takeaways
- The Tool: [Creatify AI](Try Creatify →) is a comprehensive visual ad engine that handles everything from [[product](/articles/rewrite-flow-test-jv0mg6)](/articles/rewrite-flow-test-po4skg)-in-hand image assets to rendering edited, voiced, and captioned video variations.
- The "IVA" Framework: Simplify your workflow by breaking production into three stages: Image creation, Video animation, and Ad batching.
- The Golden Ad Rule: When building the final ad layouts, use 100% video footage. Combining static product images with AI videos degrades the natural, native feel of short-form social feeds.
- No Video Editors Required: By utilizing pre-vetted, high-converting script structures and visual presets, the system edits, captions, and voices your campaigns automatically.
Prefer to watch? Here's the video. Prefer to skim? The full breakdown is below.
Try Creatify
Try it here: Try Creatify →
What Is the IVA Framework?
Historically, AI UGC generation came with a massive bottleneck: digital avatars could stand and speak, but they could not interact with or hold customized products. If you wanted an avatar showcasing a specific bottle or cosmetic cream, the visual mismatch was immediately obvious.
To solve this, I developed the IVA Framework:
- I (Image): Generate a pixel-perfect starting image of your avatar holding your custom product.
- V (Video): Animate that static frame using physics-aware motion prompts.
- A (Ad): Batch edit your generated clips into finished ad assets with captions, scripts, and voiceovers.
Let’s break down the step-by-step process of putting this framework to work.
Step 1: Create Your Base Product Images
The foundation of a realistic product-in-hand video is a clean starting frame. Rather than jumping straight into video generation—which can result in weird visual glitches—we lock in the character and product placement first.
How to set it up:
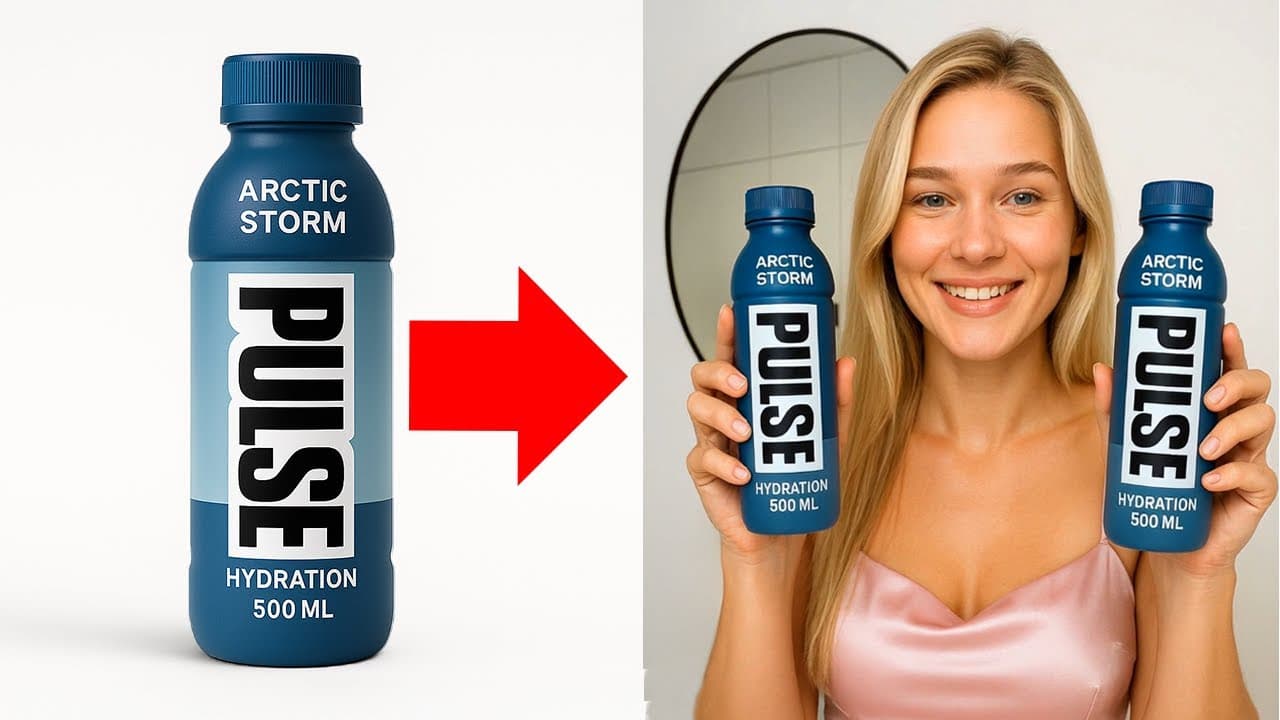
- Upload Your Product: Upload a clean, high-resolution photo of your product packaging. For my run, I uploaded the bottle design for a fictional energy drink called Pulse Hydration.
- Select Your Avatar: Choose the digital creator who will front your ad. I selected a popular avatar named Joanna, picking a baseline shot of her sitting in a bathroom environment.
- Configure Layout: Change the orientation setting to Portrait to format the output for TikTok, Instagram Reels, and YouTube Shorts.
- Generate the Base Frame: Click Generate Preview Image to render the scene. The rendering pipeline typically finishes in 30 to 60 seconds.
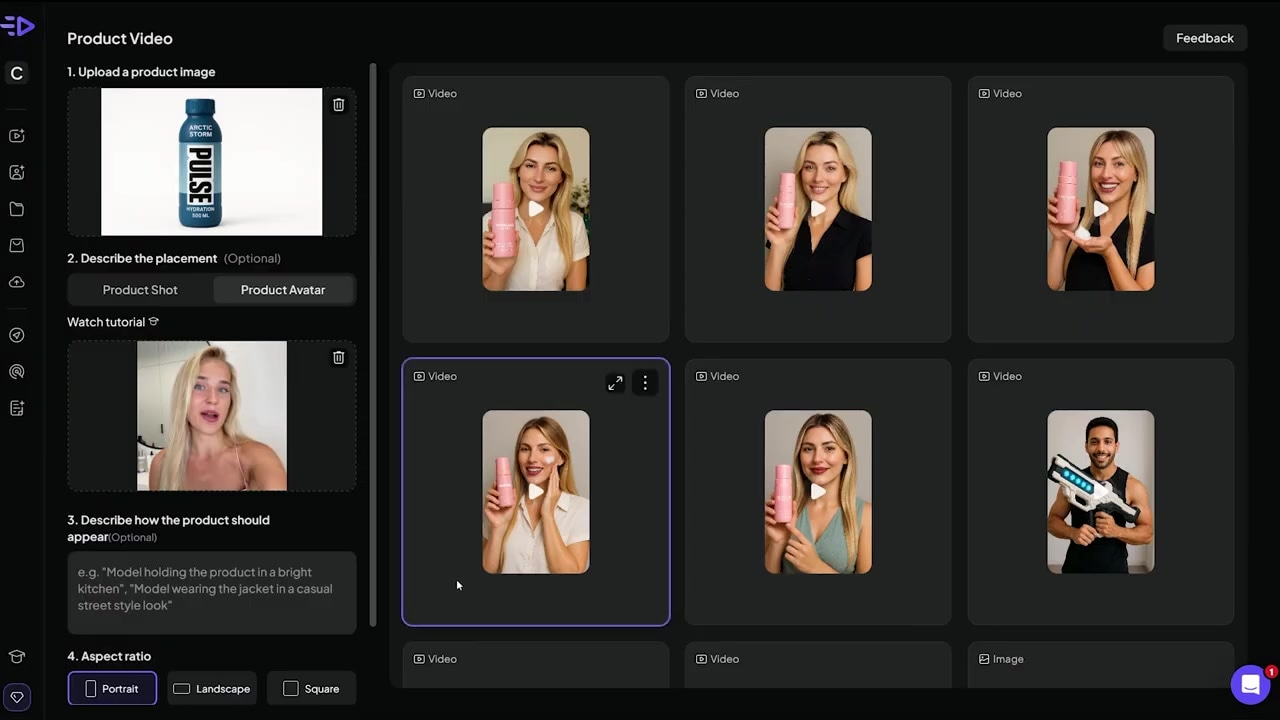
Caption: Uploading the Pulse Hydration bottle and selecting Joanna as the digital avatar to hold the product.
Fine-Tuning Your Assets
AI generation isn't always perfect on the first click. For example, my initial output had a slightly misaligned label stripe on the bottle. Instead of discarding the run, you can use text prompts to adjust the setting or action.
To create a second scene variation, I entered a prompt in the tool's instruction box:
"model sitting in her car holding the bottle with no lid on it"
Within another 60 seconds, the engine placed Joanna in a realistic driver’s seat environment, holding the custom container with the cap removed.
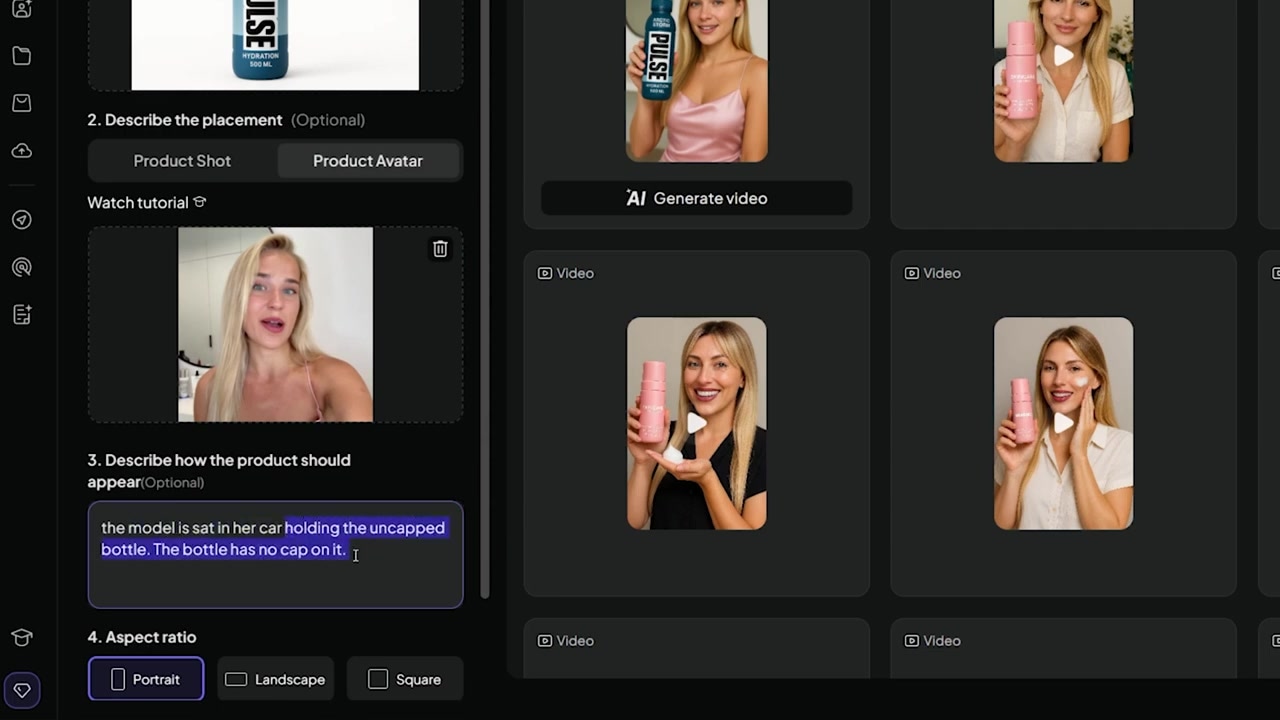
Caption: Using text prompts to instantly move the avatar into a car environment and modify how she interacts with the bottle.
Step 2: Convert Static Images Into Video Clips
With your base product-in-hand frames established, you need to turn those still images into engaging, fluid video clips.
How to set it up:
- Select your generated static image from the gallery and click Generate Video.
- Choose Showcase Style as the motion target to keep the focus primarily on the product interaction.
- Enter your motion instructions. For the bathroom scene, I prompted:
"the camera to move closer to the bottle and for the woman to smile"
- For the car variant, I wanted a more active product demonstration, so I used:
"the woman takes a drink from the bottle and then looks happy"
- Click Generate.
Note: While rendering still images takes seconds, physics-aligned video generation requires more computing power. Expect this step to take roughly 10 minutes.
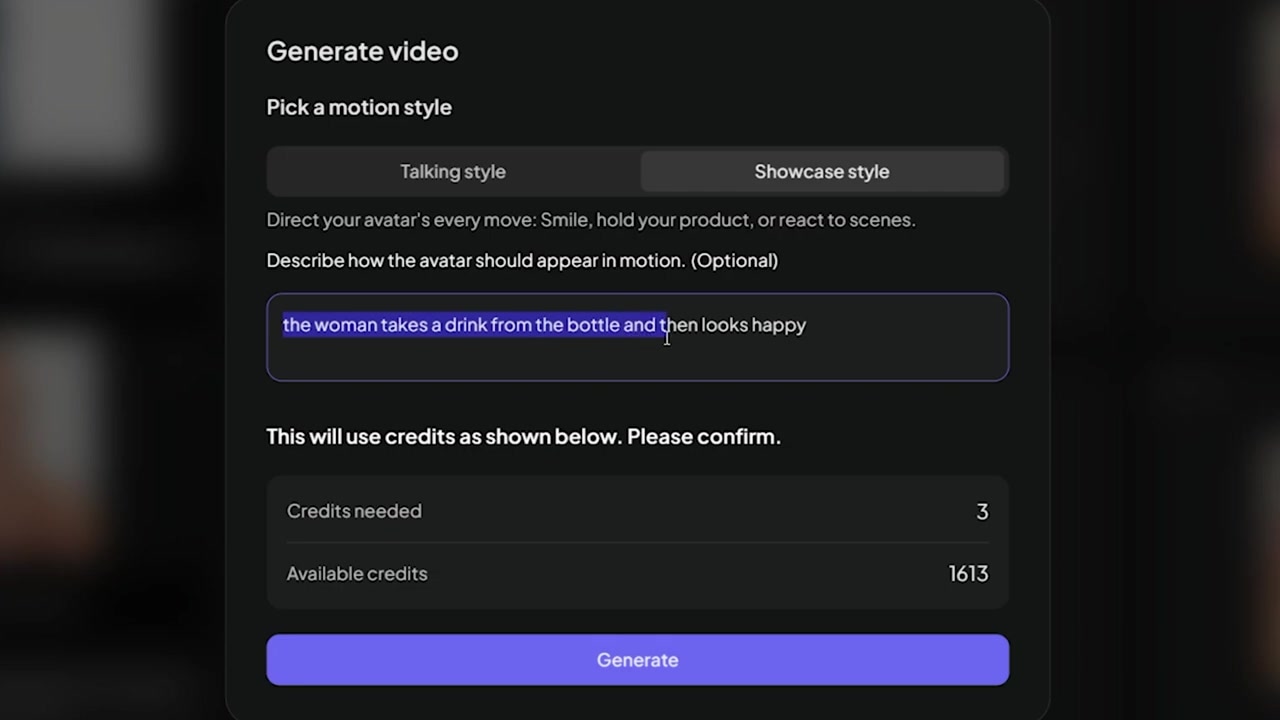
Caption: Entering action prompts to make the avatar realistically drink from the custom bottle.
Adding Product-Only B-Roll
A great social ad doesn't just rely on talking head footage. You need close-up product b-roll to cut to during features list callouts.
To get this, switch from the "Product Avatar" menu to the Product Shot tab. From there, you can prompt the engine to create camera sweeps of your item resting on a counter, completely independent of any human model.
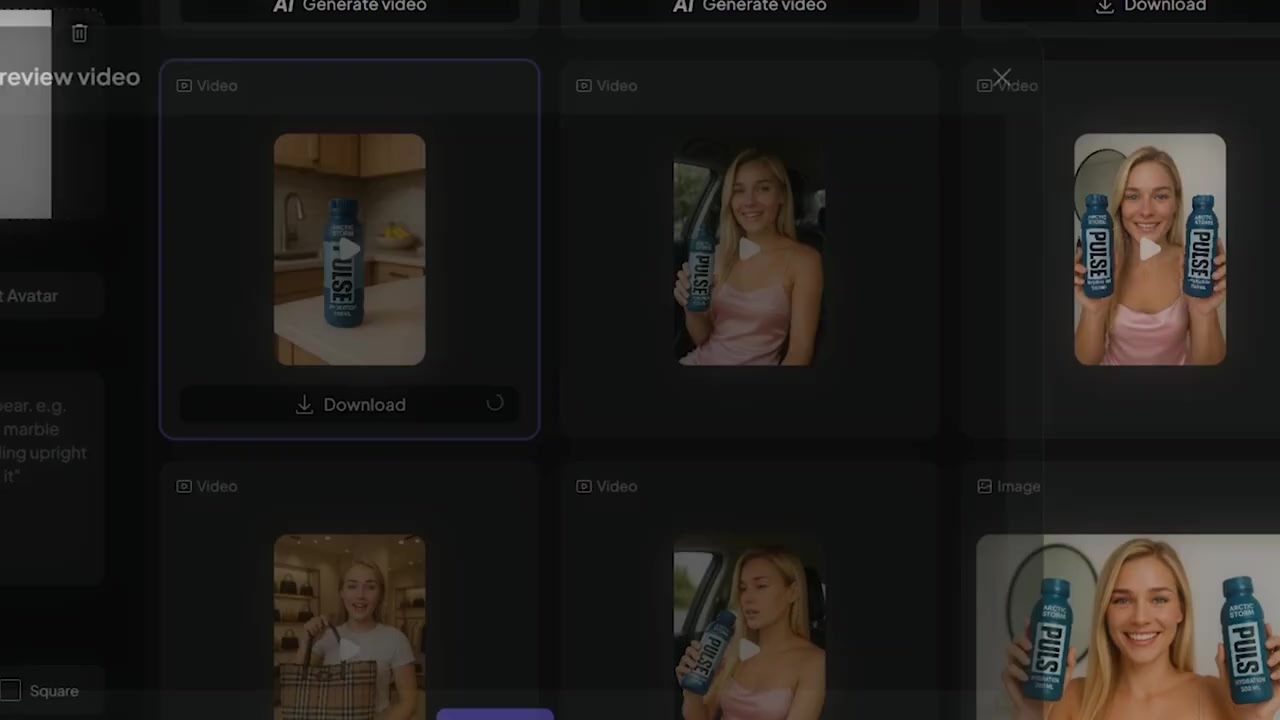
Caption: Generating realistic, product-only footage without an avatar present using the Product Shot feature.
Step 3: Create the Final Ads in Batch Mode
Once you have your core pool of video clips, you are ready to combine them into highly polished, fully edited ad variants.
Instead of working through them one by one, use Batch Mode to instantly render dozens of variations. This lets you rapidly test different angles to find the top-performing creative assets.
How to set it up:
- Access Batch Mode: Go to the main dashboard and click Batch Mode.
- Input Product Data: You can either paste your live Shopify or Amazon product page URL for an automated sweep, or input your details manually. I manually entered the name Pulse Hydration and added a short description of its key benefits (natural caffeine, essential minerals, zero preservatives).
- Upload Your Visual Clips: Select and upload the short video files you generated during Step 2.
- Critical Performance Tip: Only upload video clips here. I've experimented with both formats, and blending static images with video assets in the final ad builder results in far lower viewer retention. Aim for 3 to 5 video clips for maximum variety.
- Configure Campaign Settings:
- Aspect Ratio: Portrait (9:16).
- Duration: 30 seconds.
- Audience: Type in your target audience (e.g., "hydration enthusiasts"). This helps guide the AI scriptwriter to generate relevant hooks.
- Audio & Subs: Turn off background music (generic stock tracks can distract from the hook) and keep automatic captions turned on. The caption styling in Creatify fits native TikTok and Instagram styles right out of the box.
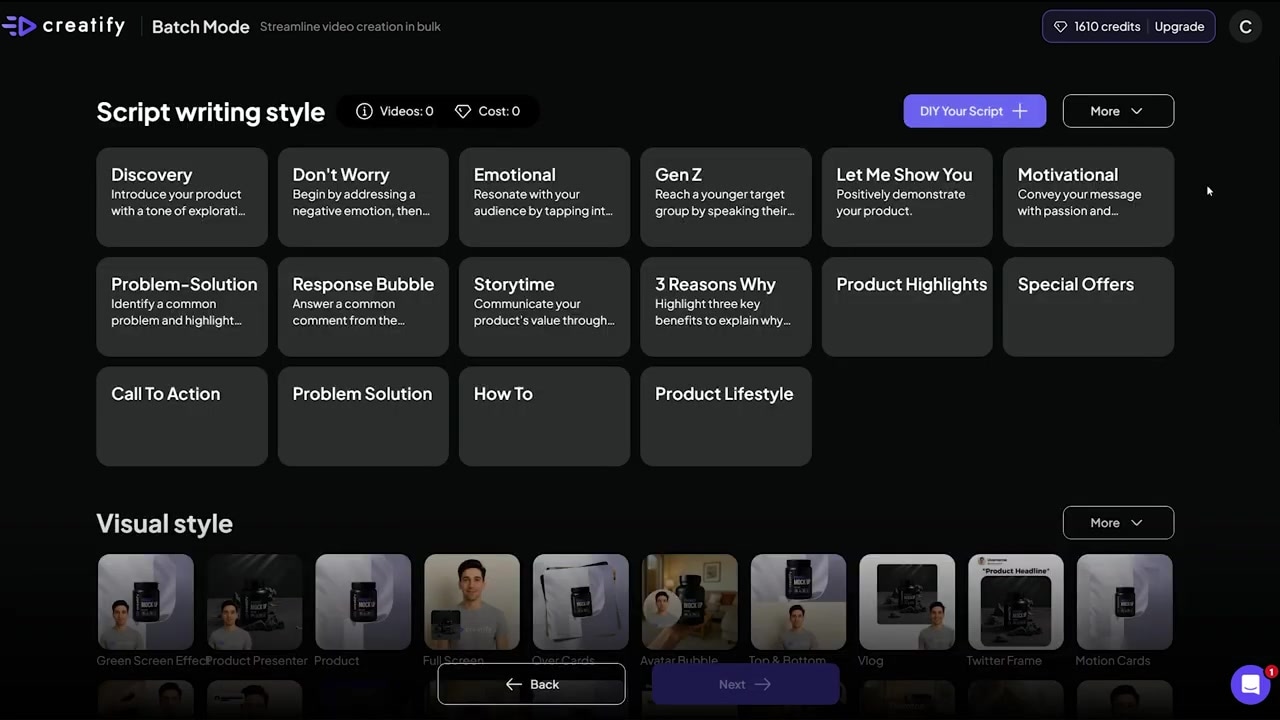
Caption: Configuring target audience, script templates, and visual editing styles inside the batch editor.
- Choose Script Styles: Creatify offers 16 proven ad script structures. Pick 3 to 5 distinct formats to test. For my run, I chose Emotional, Gen Z Focus, Motivational, Storytime, and Product Lifestyle.
- Choose Visual Editing Styles: Select how you want the video edited and styled. My testing has shown that Product Presenter, Dynamic Vanilla, Dynamic Green Screen, Product Full Screen, and Avatar Bubble yield the cleanest, most professional aesthetics.
- Verify Your Avatar Casting: Ensure you select the exact digital avatar (Joanna) used to generate your underlying video clips. This guarantees visual continuity when she speaks on screen.
- Render Your Variations: Click generate. In less than 10 minutes, the batch system will compile and render your selected scripts and styles. (For my configuration of 5 script types and 6 editing styles, the platform instantly built 30 fully distinct ad assets).
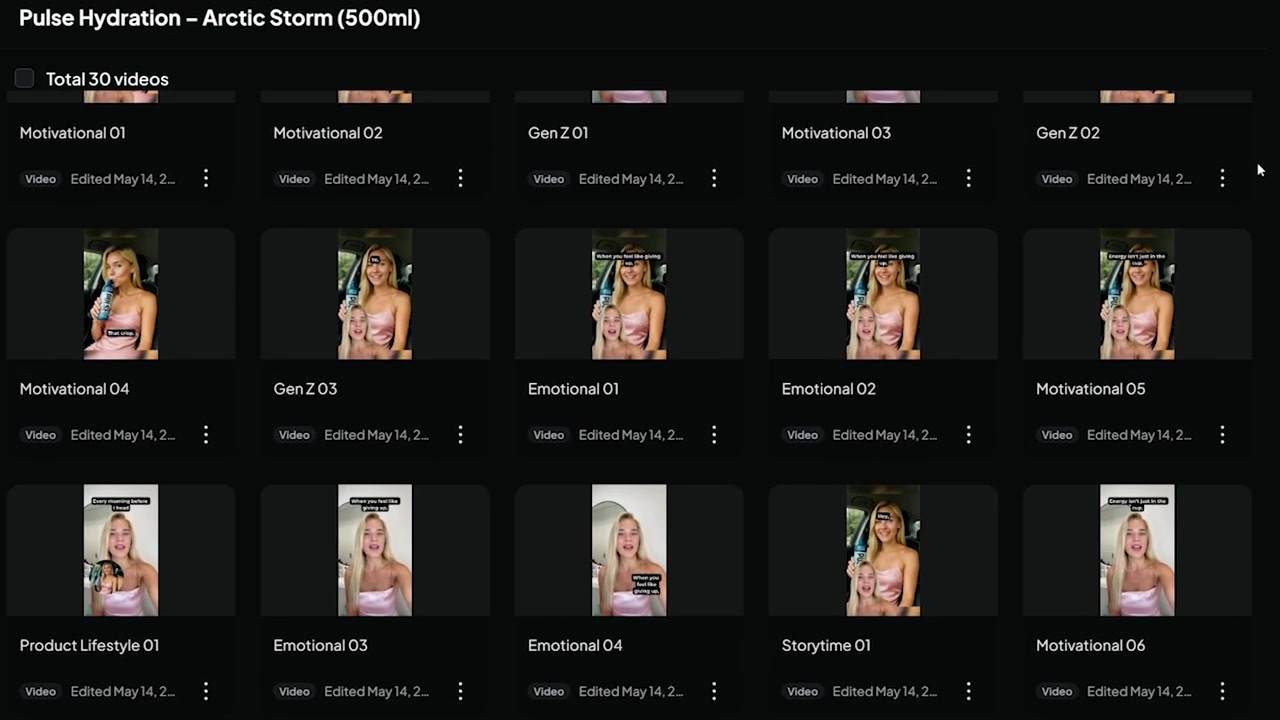
Caption: The completed render queue showing 30 different edited, captioned, and voiced variations of the same product ad.
Advanced Creatify Features: Management and Tracking
Beyond the creation workflow, there are several tools built directly into the dashboard designed to optimize your active ad campaigns:
- Direct Facebook Ads Integration: Once a video is rendered, you can click "Share" to upload it directly to your Meta Ads account without downloading and re-uploading large video files.
- Winning Creative Selection: You can review your completed grid, check the boxes on the variations that look the strongest, and batch-export those specific assets to your ad accounts.
- Smart Performance Reports: Integrate live reports directly with your ad accounts to see which variants drive conversions so you can scale winners and pause losing creatives before wasting ad spend.
- Competitor Tracker: Use the tracking dashboard to monitor specific brands in your space. This lets you study their live ads and get fresh inspiration for your next batch runs.
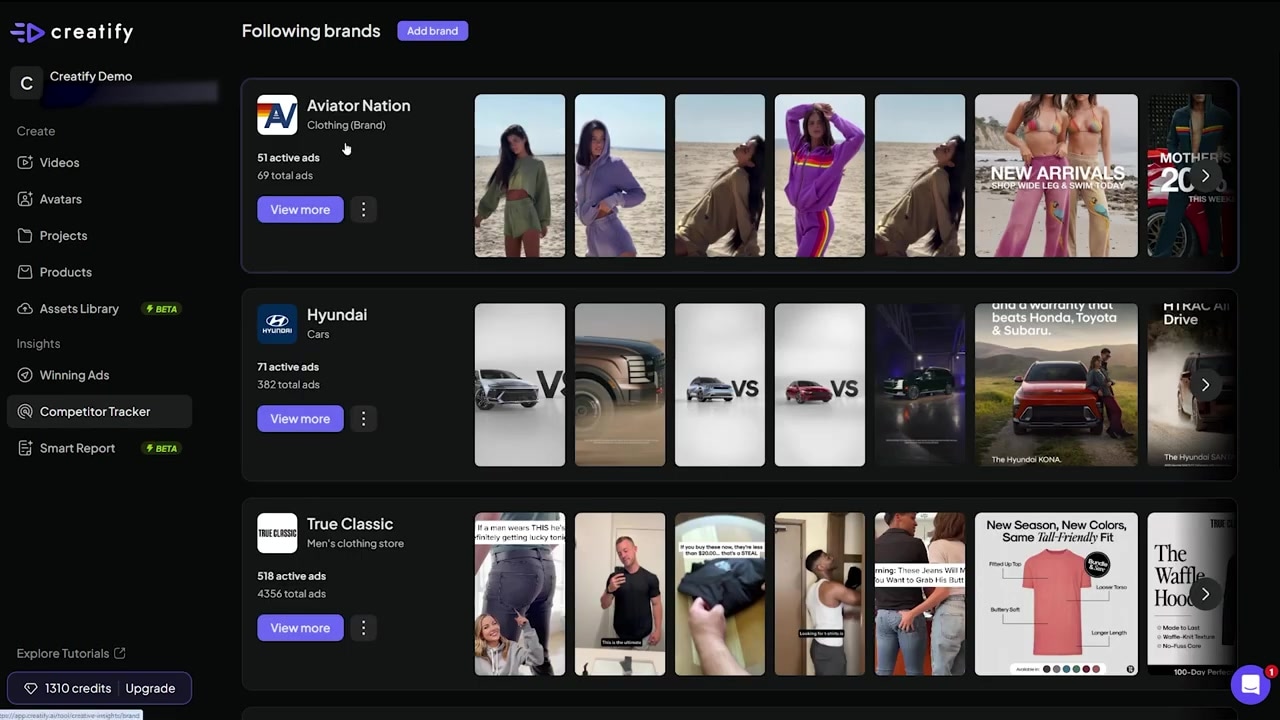
Caption: Utilizing the competitor tracker feature to monitor rival brand ad setups.
Creatify Pricing: Which Plan Do You Need?
Creatify is structured around a monthly credit system. what that works out to per finished minute While they offer a free tier, it is mostly for testing features as the final exports contain a heavy watermark.
| Plan Tier | Pricing (approximate) | Key Features Included |
|---|---|---|
| Starter | $39/mo | Watermark removal, 100 monthly credits (roughly 5 high-quality video exports). |
| Pro | $99/mo (scales based on credits) | Unlocks custom avatar uploads, Batch Mode variation building, and competitor ad tracking. |
| Enterprise | Custom | Dedicated volume, custom licensing, and team workspace management. |
Note: For the exact workflow detailed in this guide (Batch Mode and custom assets), you will need a Pro-level subscription or higher. Be sure to check the official site to verify their current rates and credits breakdown before subscribing.
Final Verdict
The speed at which AI-driven marketing tools are advancing is remarkable. What used to take a production team, a contracted creator, and weeks of back-and-forth editing can now be accomplished on a lunch break.
If you want to rapidly test marketing hooks at scale, build a dropshipping catalog, or offer automated UGC creation as a service to local brands, Creatify's visual platform is one of the most efficient all-in-one solutions on the market.
Try it here: Try Creatify →
FAQ
Do I need prior video editing experience to use Creatify?
No. The platform automatically writes the script, records the voiceover, syncs the lip movements, stitches the video assets together, and adds timed captions. No timeline editing skills are required.
Can I upload my own custom avatars or actors?
Yes, but you will need to upgrade to a Pro tier plan. Once on the Pro tier, you can upload clips of yourself or customized actors to maintain consistent branding across all your marketing channels.
Why should I turn off background music in the builder?
While music is an option, stock audio can sometimes feel out of place or clash with the style of native social feeds. Leaving music off keeps the focus 100% on the avatar's voice, allowing you to add trending tracks directly inside TikTok or Meta Ads Manager later.