Opus Clip AI Tutorial: How I Batch 1,000 Monetizable YouTube Shorts
Last updated: July 2026
Author: Greg Preece — I test AI video tools hands-on to help creators streamline their editing workflows and build sustainable, monetization-safe channels.
Creating short-form content can consume hours of manual clipping, transcription, and caption styling. In this step-by-step tutorial, I will show you how to use OpusClip to automatically convert long-form videos into highly engaging, monetization-safe shorts in minutes.
TL;DR: The Quick Workflow
- Paste your source link: Drop your long-form video URL into the OpusClip dashboard.
- Configure duration settings: Restrict clip output strictly to under 60 seconds.
- Analyze viral scores: Review the generated shorts and prioritize them using the AI's engagement feedback.
- Refine your edit: Use the transcription-based editor to adjust transition points and remove dead air.
- Publish or Export: Post directly to social platforms, download the files, or export them to Adobe Premiere Pro.
Prefer to watch? Here's the video. Prefer to skim? The full breakdown is below.
Try it here: Try Opus Clip →
The YouTube Monetization Reality Check
With YouTube introducing stricter guidelines on synthetic media, many creators worry that AI-generated shorts will eventually lose monetization eligibility. However, there is a massive distinction between low-effort synthetic channels and professional AI-assisted repurposing:
- At-Risk AI Content: Channels built entirely using synthetic AI voices, AI-written scripts, and generic stock visual overlays.
- Monetization-Safe Content: Using AI editing assistants to crop, subtitle, and repurpose your own original interviews, podcasts, and live streams.
Because OpusClip acts as an assistant editor processing real-world, original footage rather than generating synthetic visuals from scratch, the output is completely safe from demonetization.
Note: While I use a public Logan Paul interview as an illustrative example in this tutorial, you should run this process on your own original long-form content to ensure trouble-free monetization.
Step 1: Setup and Template Selection
To begin, copy the URL of your target long-form video and head over to your dashboard.
- Paste your video link directly into the primary URL box.
- Scroll down to choose a styling template. If you have previously designed a custom layout with specific fonts and asset placements, make sure to select it to keep your branding consistent across all generated clips.
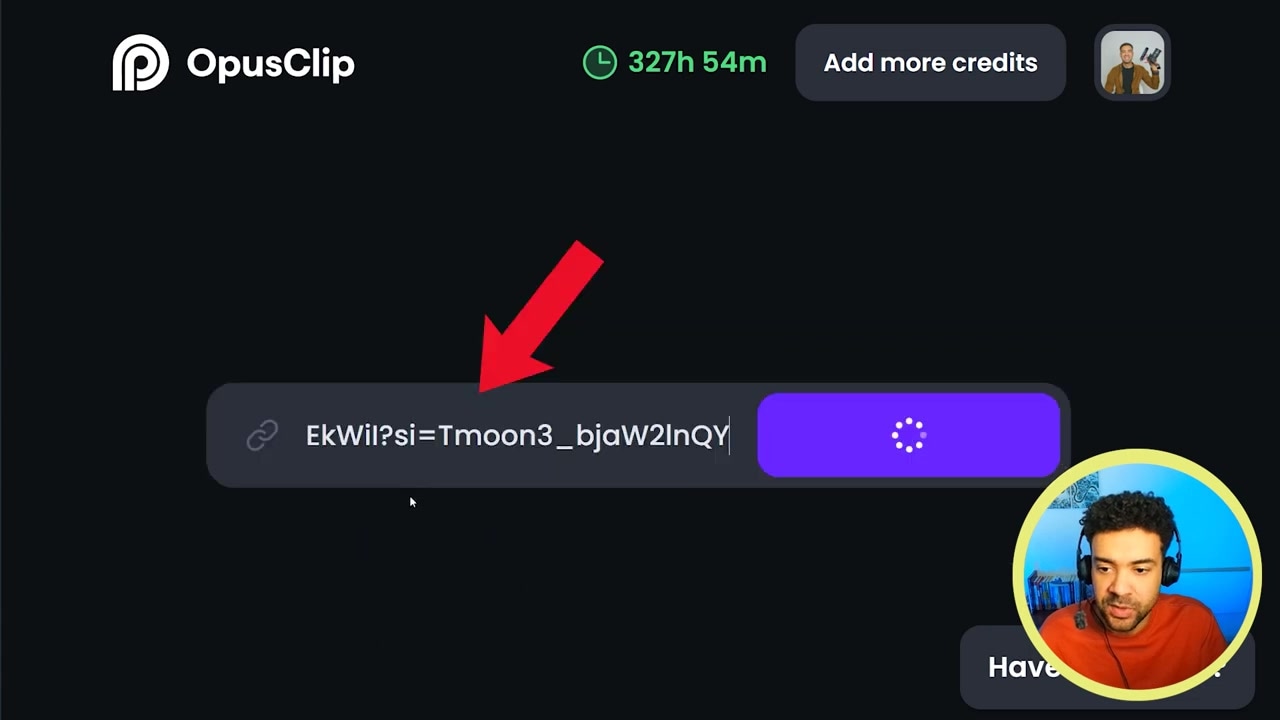
Caption: Paste your video link and choose your custom or pre-made style template.
Step 2: Restrict Clip Durations
Before clicking generate, there is a critical setting you cannot overlook: the target duration of your clips.
Because YouTube Shorts are strictly capped at a maximum of 60 seconds, you need to ensure the AI does not export anything longer. In the clip length selector, select only:
- Less than 30 seconds
- 30 to 60 seconds
If you leave longer durations checked, you may receive longer clips that require manual trimming before they can be uploaded to YouTube.
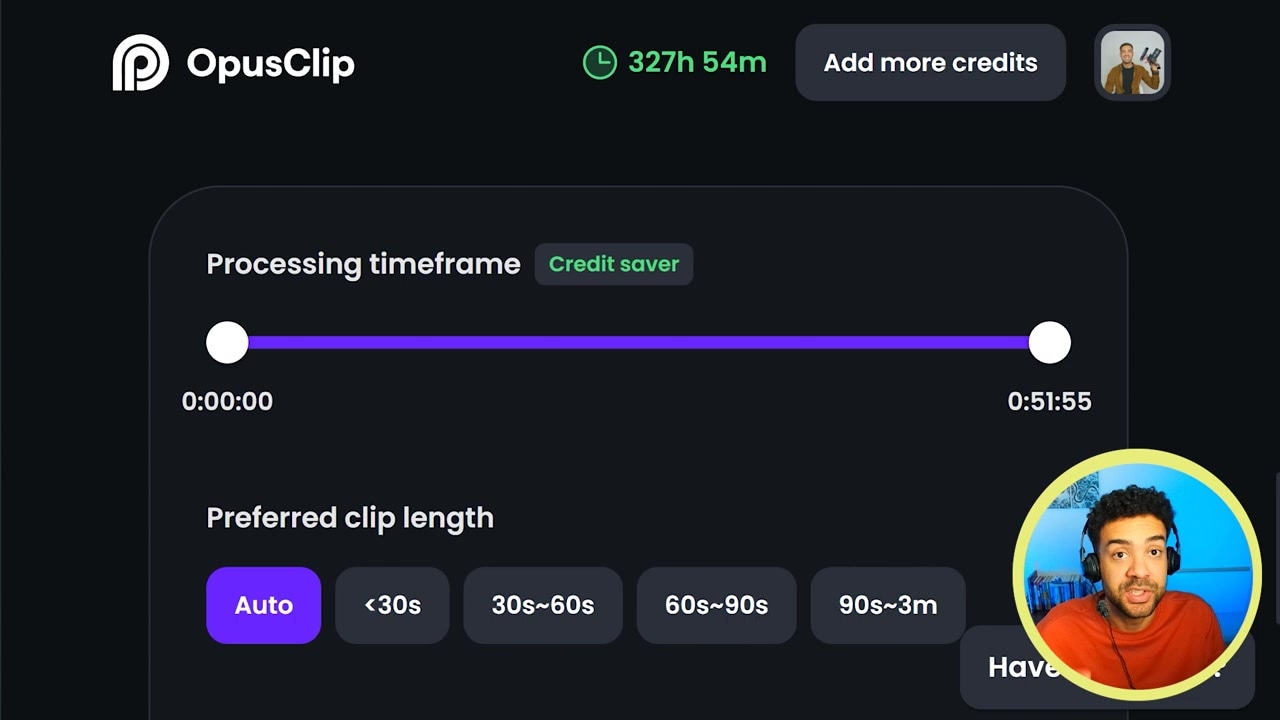
Caption: Select the under-30-second and 30-to-60-second limit options to stay within the Shorts criteria.
Scroll back to the top and hit the generation button. Within a few minutes, you will receive an email notifying you that your project is ready.
Step 3: Review Results and Viral Scores
When I processed a single interview, the AI generated 28 distinct shorts in one click.
On the results screen, you will find a Viral Score assigned to each clip. This score represents the likelihood of the clip performing well based on the platform's multi-modal analysis.
Even better, the tool provides a brief explanation detailing why it thinks the specific hook, pacing, and visual progression will drive engagement. Reading these insights is highly valuable for learning what makes a hook successful.
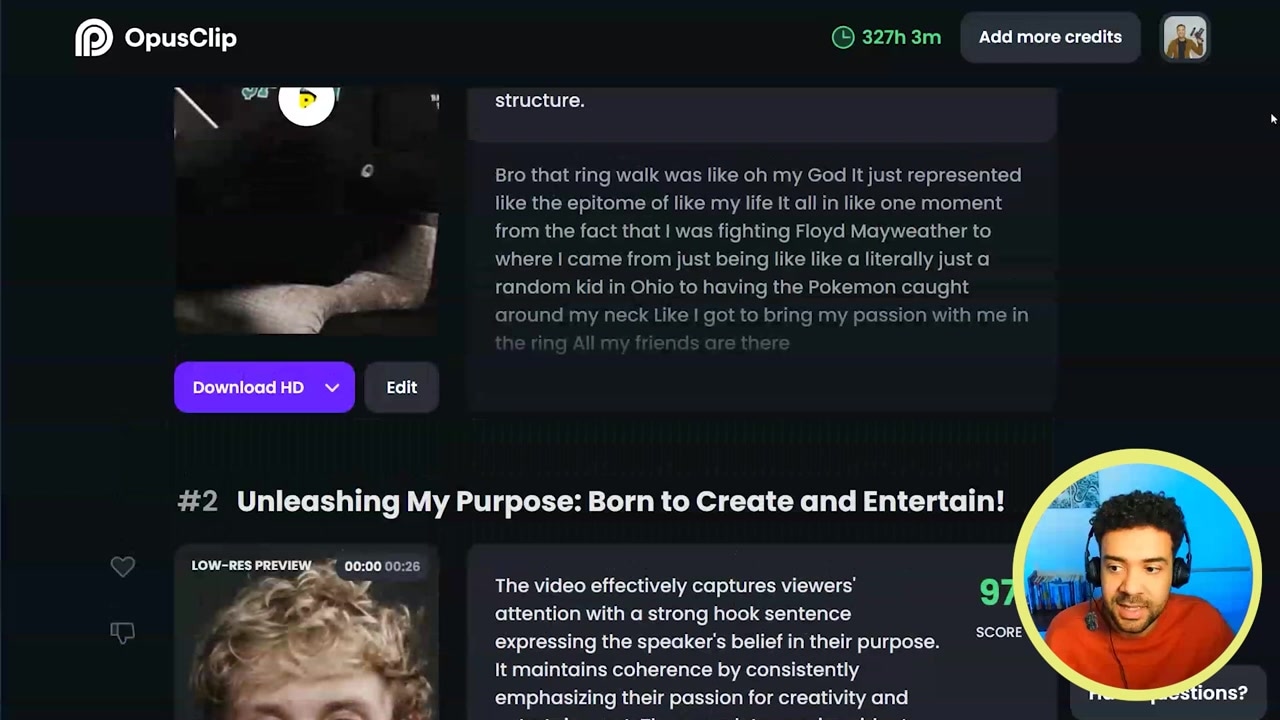
Caption: The results screen highlights the viral potential and logic behind each generated video chunk.
Step 4: Edit and Customize Your Shorts
Even though the AI does the heavy lifting, you will occasionally want to tweak a clip to make it perfect. Clicking the Edit button opens the visual editor.
Transcript-Based Trimming
Instead of dragging timeline playheads, click on any word in the transcript and select Set as start or Set as end to shift the clip's boundary in seconds. You can also press the pause removal toggle to cut out dead air instantly, keeping the video fast-paced and snappy.
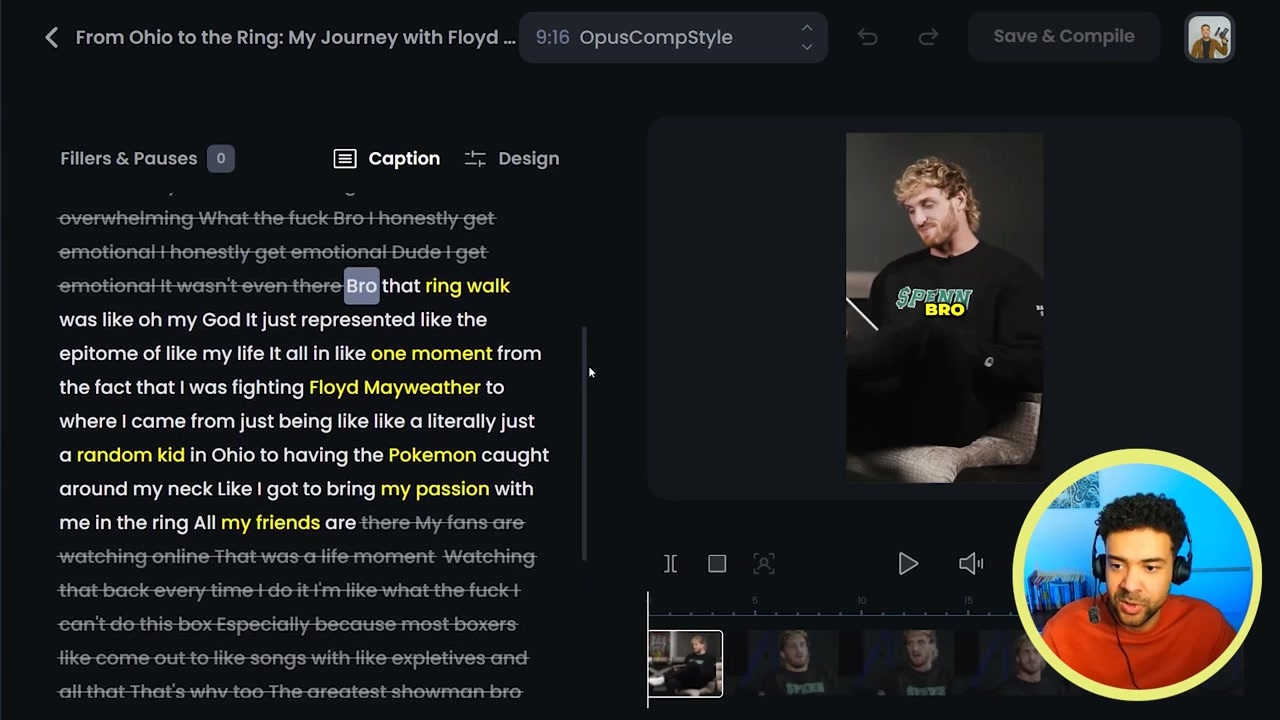
Caption: Select words in the transcript to instantly set start and end frames and delete awkward pauses.
Custom Caption Design
Head to the Design tab to adjust your captions' layout:
- Toggle the emoji switch to display contextual emojis on-screen.
- Choose whether to display one, two, or three lines of text simultaneously.
- Pick your screen position (middle is recommended to avoid overlapping platform UI boundaries).
- Choose your caption transition animation style.
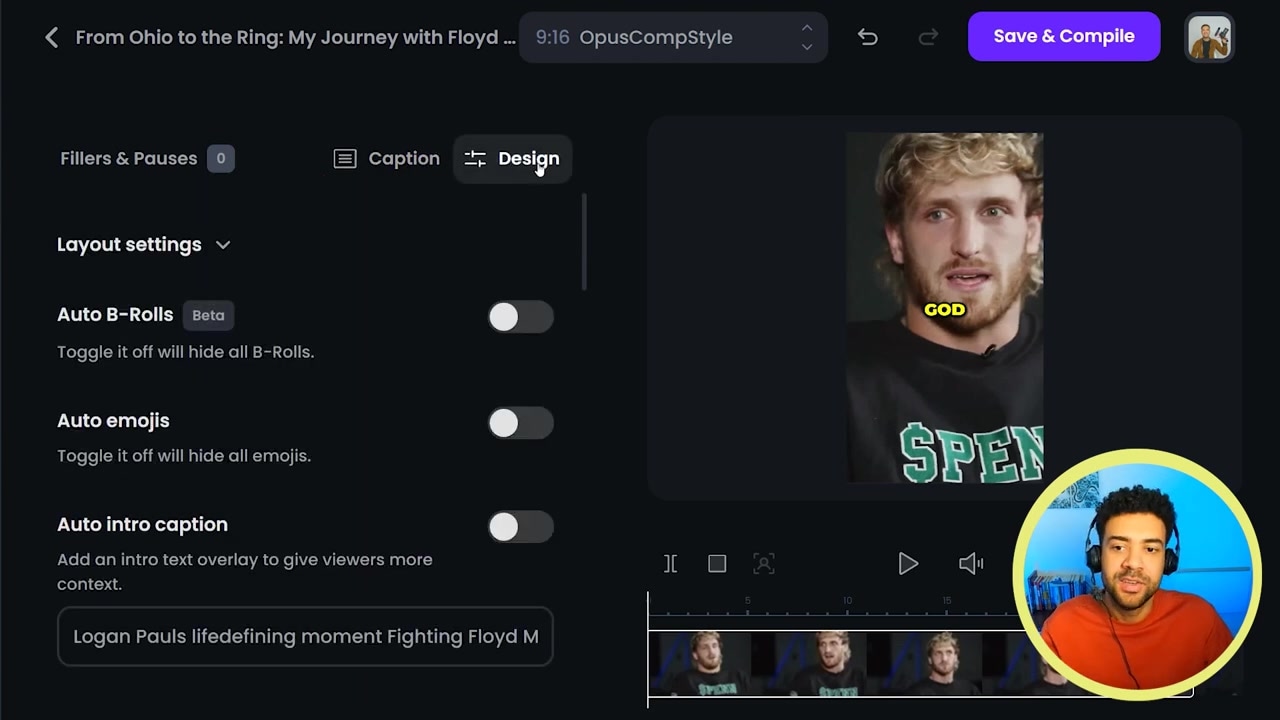
Caption: Use the Design tab to adjust caption layout, font lines, positioning, and auto-generated emojis.
Step 5: Exporting and Direct Publishing
Once your edits are finished, you have two routing paths:
- Direct Publishing: Link and schedule or publish your short directly to YouTube, TikTok, Instagram, and LinkedIn from inside the dashboard.
- Advanced Editing: If you want to perform advanced post-production work, you can export the short's project file directly to Adobe Premiere Pro via an XML export.
Note on Plans: You can download your finished clips on the free trial. Advanced features like built-in scheduling require upgrading to the Pro tier (which typically runs around $29/month, though promotional rates can drop it lower). However, the free plan is more than enough to test the waters and manually download your clips.
How I Generate 1,000+ Shorts in 8 Minutes
If one video link generates roughly 20-28 clips, how do you scale that to 1,000 shorts?
The secret lies in parallel processing. OpusClip does not limit you to processing one link at a time.
Because the rendering happens completely in the cloud, you can kick off multiple clipping projects simultaneously without taxing your local computer hardware.
- Open five to six separate browser tabs side-by-side.
- Paste a different long-form video URL into each tab.
- Apply your layout template and hit generate across all tabs.
By spending about a minute pasting five or six videos, you will quickly have 100 to 120 clips rendering at the same time. Repeating this quick process across a batch of URLs will yield over 1,000 ready-to-go shorts in under ten minutes of active setup time.
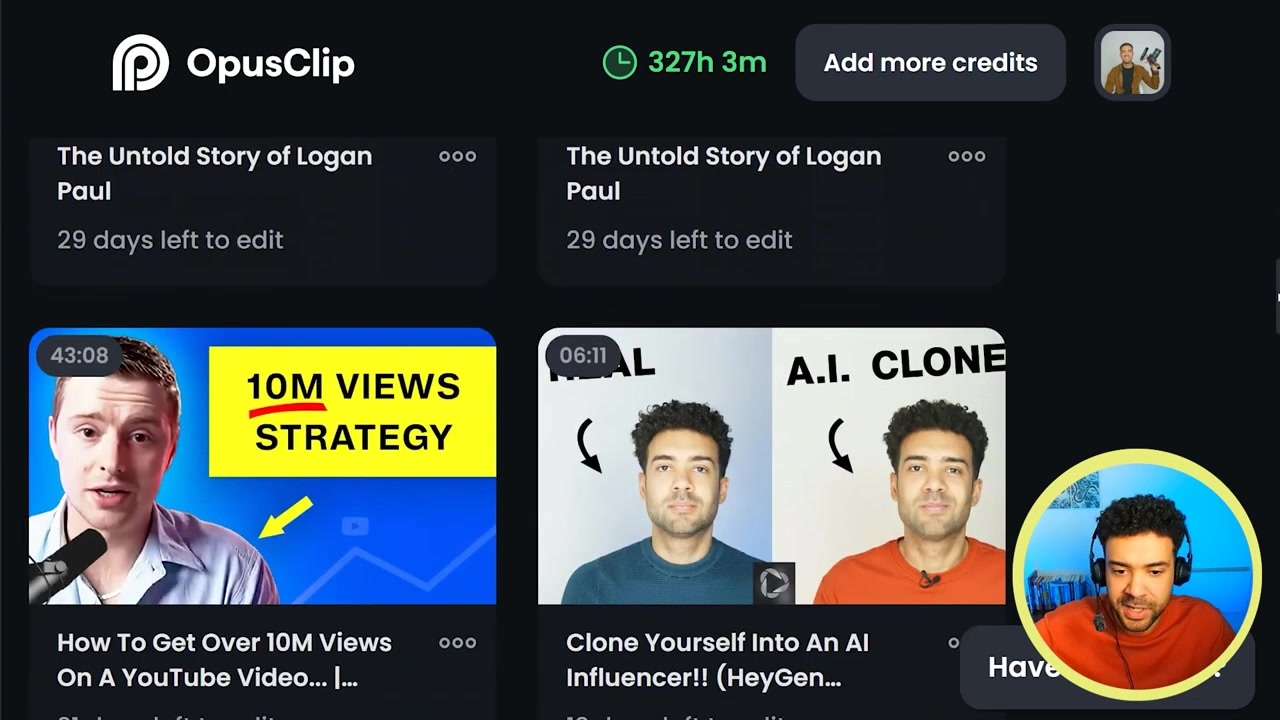
Caption: You can run multiple clipping projects in parallel by opening new tabs and submitting URLs simultaneously.
Try it here: Try Opus Clip →
Frequently Asked Questions
Does using OpusClip risk my channel's monetization status?
No. YouTube's strict policies penalize low-effort, fully-synthetic AI channels (AI scripts + AI voices + stock videos). Because you are using OpusClip to crop, transcribe, and subtitle original footage (such as your podcasts, webinars, or streams), your content remains monetization-safe.
Can I edit the clips in external software?
Yes. OpusClip supports direct XML export. This allows you to import the cut sequences directly into Adobe Premiere Pro to do advanced sound design, color grading, or custom transitions.
Do I need a paid plan to try it?
No. You can sign up for a free trial to generate and download clips. Features like automatic social media scheduling are reserved for paid tiers like the Pro plan.